
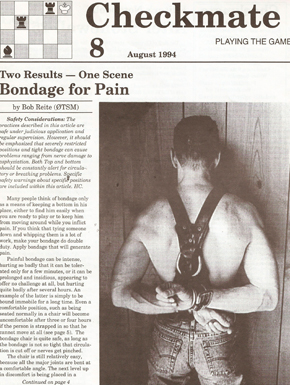
Bondage for Pain
By zerotsm
This article originally appeared in Checkmate magazine, Issue 8, August 1994
Part 1
Safety Considerations: The practices described in this article are safe under judicious application and regular supervision. However, it should be emphasized that severely restricted positions and tight bondage can cause problems ranging from nerve damage to asphyxiation. Both Top and bottom should be constantly alert for circulatory or breathing problems. Specific safety warnings about specific positions are indicated within this article.
Many people think of bondage only as a means of keeping a bottom in his place, either to find him easily when you are ready to play or to keep him from moving around while you inflict pain. If you think that tying someone down and whipping them is a lot of work, make your bondage do double duty. Apply bondage that will generate pain.
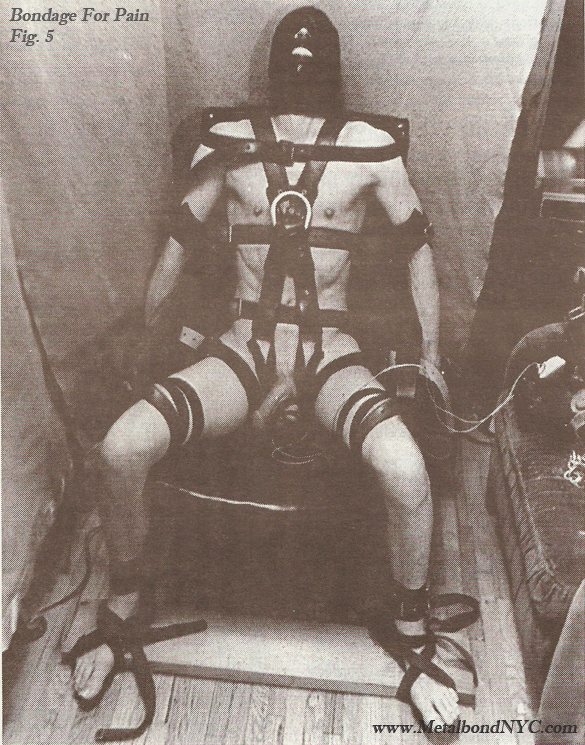
Painful bondage can be intense, hurting so badly that it can be tolerated only for a few minutes, or it can be prolonged and insidious, appearing to offer no challenge at all, but hurting quite badly after several hours. An example of the latter is simply to be bound immobile for a long time. Even a comfortable position, such as being seated normally in a chair will become uncomfortable after three or four hours if the person is strapped in so that he cannot move at all (see Fig. 5). The bondage chair is quite safe, as long as the bondage is not so tight that circulation is cut off or nerves get pinched.
The chair is still relatively easy, because all major joints are bent at a comfortable angle. The next level up in discomfort is being placed in a sleepsack and in turn strapped down so that one cannot move. The arms will start to ache first, because of the elbows being held straight with the arms against the sides of the body. The same effect can be had with mummification. The main caution in the use of sleepsacks or mummification is to check on numbness, especially in the arms.
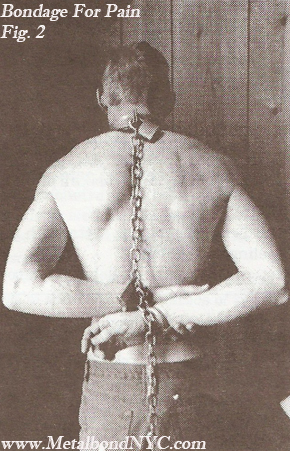
Complete immobility is not necessary to create painful bondage. A favorite of HC is shown in Fig. 2. A chain leads from a steel collar to Darby style handcuffs behind the back. The chain length is adjusted so that the forearms are horizontal. The bottom is totally free to move about otherwise. This position is a great example of insidious painful bondage. For the first fifteen minutes, it will seem entirely trivial, but some people will notice distinct discomfort in the shoulders and upper arms after a half hour. At the one hour mark, all but the true pain pigs will want out of the position. The subject will try moving his hands and arms about in various ways seeking comfort for the shoulder that hurts the most, which will transfer the stress to the other shoulder. At this point the fun begins for the top, watching the bottom squirm.
 The Darby handcuffs place no undue stress on the wrists so there is little danger of nerve damage in the hands, the position jut keeps hurting and hurting more with time. If you don’t have a pain pig bottom and you want to make the scene last longer, say an overnight scene, start out with the arms lower down, or raise and lower them as the scene progresses. If you want to hurry the scene along, run a strap across the chest through the arms. This will prevent the bottom from gaining any sort of relief by shifting position.
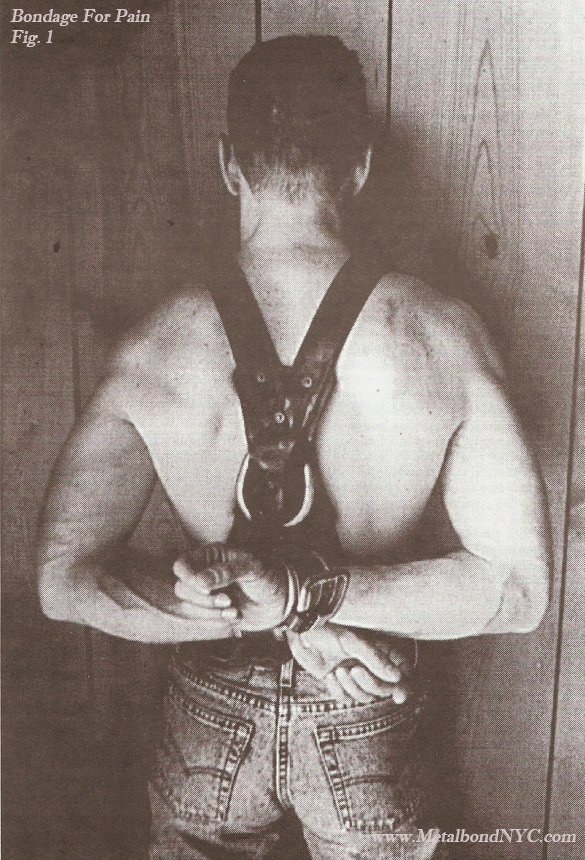
Safety considerations: Do not raise the arms above the horizontal to hurry things up. Extreme hammerlock positions place excessive stress on the rotator cuff and can cause physical damage. It may interest you to know that in college wrestling, one is disqualified by taking a hammerlock beyond the horizontal. While this position can be done with a leather collar, or with leather neck and wrists harnesses expressly made for the purpose, the steel collar is preferred. Leather will tend to choke, while the rigid steel will just pivot on the bottom’s shoulders and dig under his chin. To do this scene on a bottom with a prominent Adam’s apple, a chest harness with a ring back can be substituted for the collar (see Fig. 1). Over all, this position is pretty safe and does not have to be monitored closely, but you’ll want to remain within earshot so you can hear the bottom scream and beg for release.
If the wrists to the collar position doesn’t seem enough, the chain can be extended down to leg irons for a hogtied in steel position. If you are feeling generous, lock the chain to the mid-point of the leg irons. We were not feeling generous, so in addition, we locked the leg irons together as shown in Fig. 4.
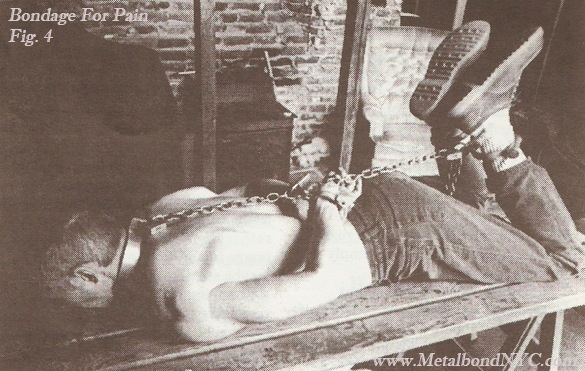
You don’t have to pull them up too tight. The legs will eventually cramp, so that the bottom will have more than just his shoulders to think about. As in any hogtie position, this scene needs to be continuously monitored. Unless the bottom is capable of turning on his side, the pressure on his chest will make breathing difficult. Eventually the muscles involved in breathing will totally tire from this position and the bottom must be released or turned on his side. The problem will occur quickly for obese people, but even athletic in-shape individuals need to be monitored. If your bottom has back problems, you can still do this scene, but do not draw the legs up too tightly.
Another painful position which HC and I cam up with independently is called “The post torture.” All that is needed for the original version is a vertical post or tree, padded wrist and ankle restraints, padding, such as a pillow, and some rope. A 4×4 post or tree of similar dimensions with no branches in the way is ideal. The captive is placed kneeling on the pad with his back to the post. The ankle restraints are tied together behind the post. The arms are raised over the head and locked behind the post in the restraints. This is the basic position. If you are the patient sort, all you have to do is wait. Of course while you are waiting, tits, cock and balls are available for your amusement. The stress in the original version is on the arms, chest and back.
Safety considerations: Don’t skimp on the knee padding. The object is to make the upper body hurt, you don’t want to have to quit the scene because the knees are giving out. People who have knee problems should do the suspension alternative discussed below. The strain on the back is also a prime consideration. People with any sort of back problem should not do the original version, but there is an effective alternative position.
This position is one that must be monitored continuously. Like a crucifixion scene, the rib cage and abdominal cavity are placed under a lot of stress. Like being hogtied while lying on the stomach, the muscles associated with breathing will tire. While most people will want out of the scene before breathing becomes a problem, it is something that must be considered.
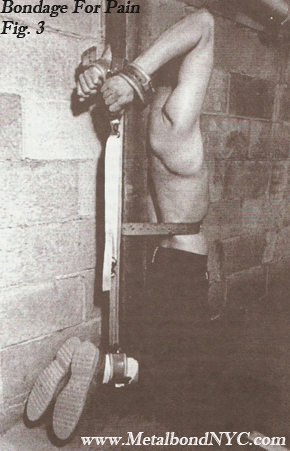
The back problem can be eliminated by strapping the waist to the pole. A large weight lifting belt works well. This relieves nearly all of the stress on the back and transfers it to the chest and arms. You can now get very intense with this position by connecting the wrist and ankle restraints with rope or straps and tightening it enough to just raise the feet off the ground (see Fig. 3). Now watch the bottom struggle, he can try to lift his legs to ease his arms but he won’t be able to hold them high for very long. This tends to be a very short scene, so use a slip knot at the feet so you can loosen things quickly.
Humane Restraint makes a quick release strap buckle which allows instant removal. This is preferable to rope since it is easier to manipulate when tightening or loosening the strap to intensify or ease the stress.
There is a risk of dislocating the shoulders if the position is made too tight. The average person will tell you anything you want in fifteen minutes. With pain pigs, the limiting factor is the hands going numb at roughly the thirty minute mark.
Yet another variation that I like is to hang the bottom from the post in a suspension harness, instead of having him on his knees. Having no part of the body touching the ground enhances the feeling of helplessness. Another plus is eliminating all worry about knee problems. The downsides are the usual ones with suspension, legs going numb because of pressure from the harness and the rare individual that gets dizzy or nauseous when suspended.
Part 2
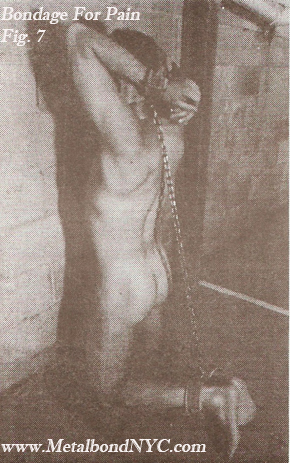
In part 1, I discussed post torture. If you do not have a post or tree available, a free-standing restraint system is possible. You will need a steel collar with at least one attaching ring and a couple of padlocks and chain, in addition to the items used for the traditional post torture. After attaching the ankle and wrist restraints, have the bottom kneel. Put on the collar and fasten his wrists to the attaching ring with a padlock, as well as the length of chain Then run the chain to the ankle restraints (see Fig. 7 ) . It is also possible to start out with the bottom lying down. The same safety considerations as the traditional post torture apply here. Since the bondage sculpture you have created is vertical without any supporting structure, there is the additional danger that he might fall over. It is, therefore, even more important that the subject be monitored continuously.
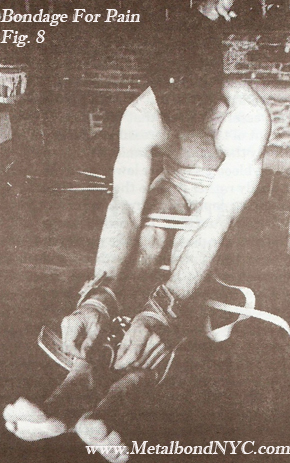
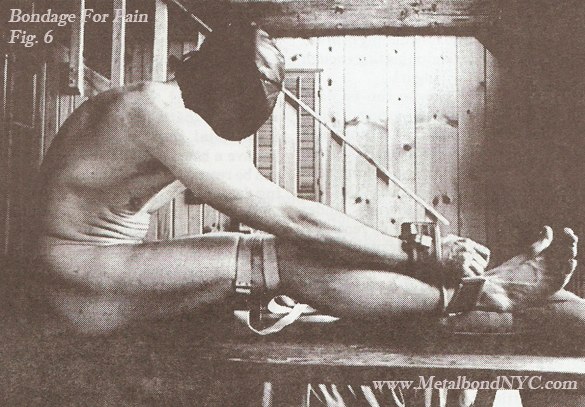
Other painful bondage involves stretching the legs in various ways. Stretching the hamstrings is popular. One way to do it is to bind the wrists and ankles together in front of the person while they are seated on a slotted table. Straps are then placed just above the knees and tightened. (See Figs. 6 and 8 ) .
Another way to do it is have their legs strapped down tight to begin with, then pull on their wrists towards their feet to tighten. The former method seems slightly easier on the back than the latter.
One can also stretch the legs sideways. At some Inferno runs, there was a machine made ostensively for the purpose of limbering up ballet dancer’s legs. By turning a crank, wedges moved against the legs to spread them apart. At Inferno XX, a simpler means was devised. This was simply a 2X6 8 feet long with one inch holes drilled in each end. The bottom sat on one side, with either boot hoist or ankle restraints on, ropes led through the holes to a small block and tackle, which was carefully tightened. Extreme care must be taken with either of these devices to prevent going too far and tearing a ligament.
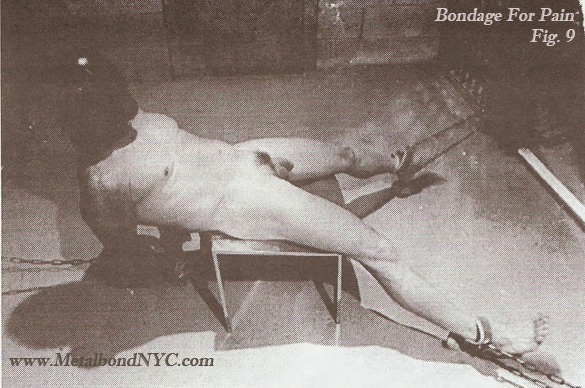
There is another technique that combines leg stretching with some discomfort for the arms. For this, a low stool, about 12 to 14 inches high is needed as well as three points on or near the floor, positioned in an equilateral triangle, about 8 to 10 feet on a side, as well as some rope and wrist and ankle restraints. After the restraints are on the bottom, he is placed on the stool, then assisted in leaning back and supporting his upper body with his arms behind him. (See Fig. 9 . ) Then the legs are stretched to the other two fastening points. All that is needed is rope to the distant screw eyes, you don’t have to stretch the legs very tight to achieve a good level of discomfort.
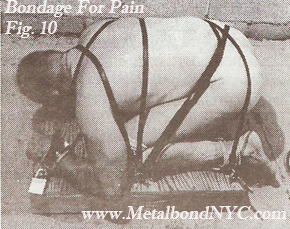
After all that stretching, our bottom might like to be crunched into a ball. One item that has appeared in the literature is the bungee board. (See Fig. 10 . ) This is another scene that looks easy until you have tried it.
Another variant of being balled up is the parrot perch. For this a secure suspension point and a chain host is mandatory. Other required items are padded wrist restraints (Humane Restraints are recommended because of their strength. Many of the wrist restraints found in S/M toy stores may have the connecting rings or staples pull away from the leather and an embarrassing or dangerous moment), a quick link or double headed clip, knee pads, a 2” pipe and some chain are needed. Some people like to use a 4X4 with screw eyes, but for safety, eyes that go clear through the 4X4 and bolted on the other end should be used. To place someone in the parrot perch, put on the wrist restraints and fasten them together with a quick link or a double-headed clip. You may have to use more than one quick link to get the correct distance, which is the width of both the subject’s legs placed together. Alternatively, a short web belt with a quick release buckle (again, Humane Restraint makes a secure, relatively cheap belt which will work) can be used in place of the steel connectors. These have the advantage of being infinitely adjustable. Since there will inevitably be loose strap ends hanging around, they may not be tidy enough for some people. Knee pads should be put on, but placed just below, rather than directly on the knees. Knee pads are not normally required if you use web belts. However, they are critical to protect the shins if quick links or clips are used.
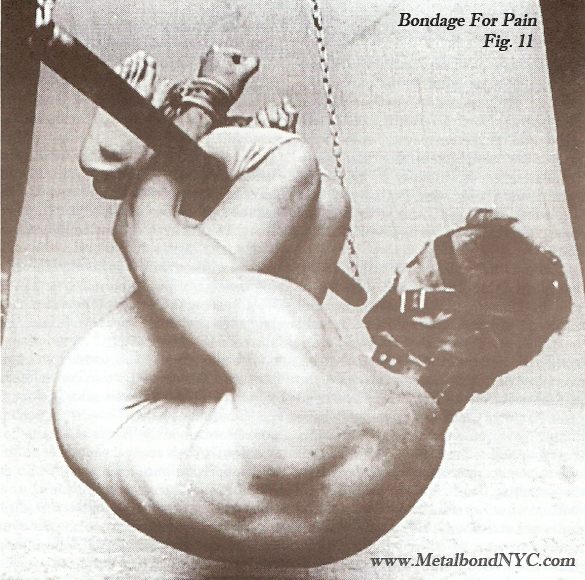
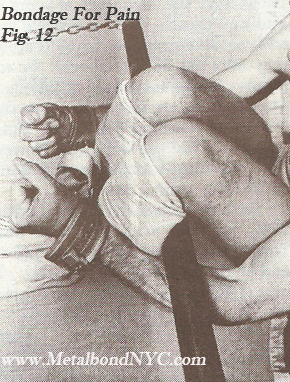
Sit the person on the ground and have them put their arms over their knees. Thread the pipe or 4X4 under the knees and above the arms. (See Fig. 12 . ) The pipe or 4X4 is then attached to the chain host. Raise the bottom off the ground. (See Fig. 11 . ) Because the pipe is locked between the bottoms knees and elbows, it won’t slip. While it is traditional to inflict other pain to a person in the parrot perch, the position itself is rough enough. The pipe behind the knees is harder to take than the 4X4. The main safety considerations are making sure that your hoisting equipment is secure and checking often for numbness in the hands.
A favorite position of mine which also involves getting relief in one part of the body at the expense of another part is illustrated in Fig. 13. All that is needed are wrist and ankle restraints, some rope and an overhead fastening point. A chain hoist hanging from above is ideal, but rope thrown over a tree branch or beam will work, as long as it can be made tight enough to resist the struggles of the bottom.
To put the bottom in position, begin by using one length of rope to make a cock and ball harness. While a commercial cock and ball harness or parachute could be used, I have found that they will eventually slip and give the bottom more freedom than planned. Lock the wrists to the chain host or tie them with rope overhead in such a way that the top can adjust the length easily. Now tie the ankle restraints together and to the cock and balls so that the bottom cannot stand up straight. The best starting length is such that when the bottom tries to stand up, his cock and balls are stretched quite tight when his thighs are at a 45-degree angle. Finally raise the wrists just high enough so that the bottom will not be able to rest his buttocks on his ankles when his arms are fully stretched overhead.
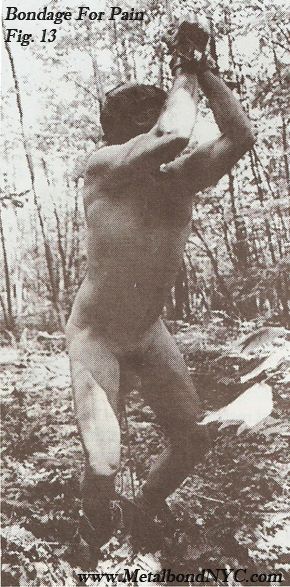
Now the fun begins. When the bottom positions himself at the lowest point, he is having to support a good part of his weight by his wrists and his arms will get tired fairly fast. He will then try to stand up to relieve the strain on his wrists, but will not be able to stand up fully. He will have to support most of his weight by his legs at a great mechanical disadvantage. He will feel it in the quadriceps first, but eventually all the leg muscles will ache and he will squat back into suspension by his arms, starting the cycle over again. By adjusting the length of the chain hoist and cock and ball rope, the intensity of the scene can be varied.
Be sure to use well-padded wrist restraints. Since the bottom can take the pressure of his arms, breathing is not an issue here, but he still needs to be monitored continuously. If you push the bottom hard in this scene, he may not be able to keep his balance once you let him go. When it comes time to release him, undo the rope between the ankle restraints and balls first. He can then use the overhead rope to assist himself in standing, but you should also be prepared to assist him and help him “work his legs out.”
THE END
NOTE: this article and pictures are Copyright © 1994, 2010 and 2013 by Mountain Publications, a division of Telecentral Electronics.
Posted by Metalbond with permission.
Metalbond would like to thank Jim for his help with preparing the text of this article for posting.
Ooooh, they all look fun, except for Number 6… my back would never take that. And you can tell those are vintage pics because the Humane Restraints look plentiful… try finding them now.
I just wish I had somebody to get me into some of those positions.
Go to Humanerestraint.com or the Handcuff Warehouse. BDGsales.com also has them. Humane Restraint knows that a lot of their goods go to kinky people.
Great article and some great pics! Hope to experience some of these myself later this year… Woof Woof!!
I’d like to try all of those. I already have a good idea for the ‘parrot’s perch’ (#11), since Dalton of seriousbondage has a couple of parrots.
Individuals who are interested in experimentation can contact me via Recon. The location is about 3 hours by bus or car west of downtown Manhattan in Northeast Pennsylvania.
Zerotaf