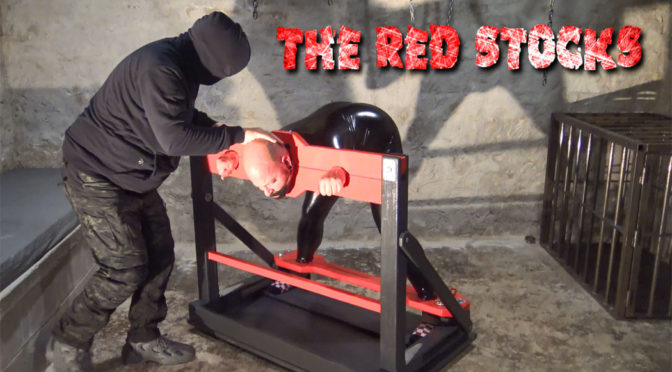
The most recently added videos from Men in Chains include “The Red Stocks,” “Vegas Bound: Part 2” and “Chain Sleepsack in the Crypt Cage”:
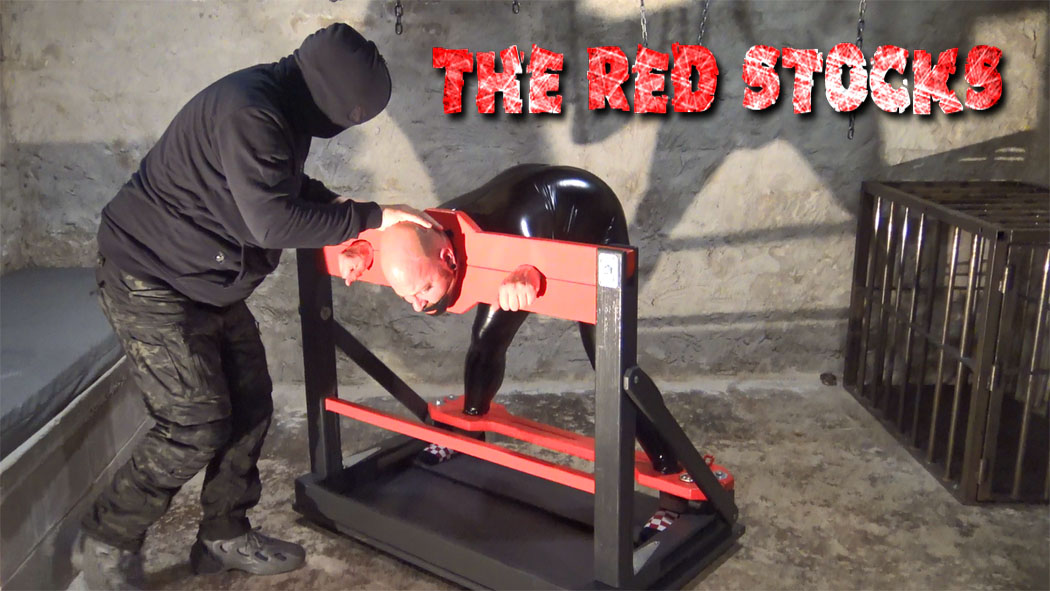

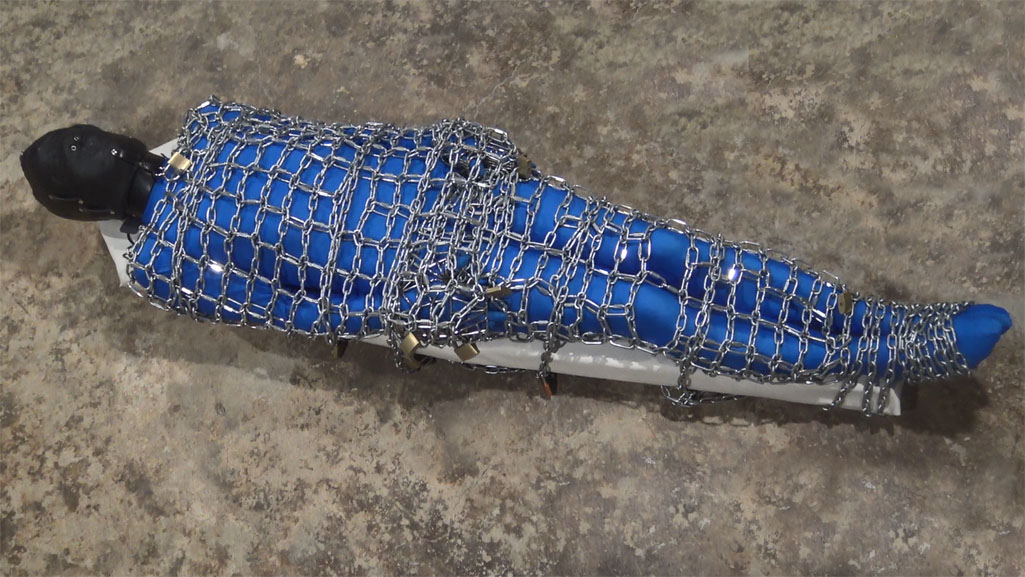
These VIDEOS are available now at Men In Chains


The most recently added videos from Men in Chains include “The Red Stocks,” “Vegas Bound: Part 2” and “Chain Sleepsack in the Crypt Cage”:
These VIDEOS are available now at Men In Chains
By Hunter Perez
I rode my bicycle up the driveway to my pal Jock’s home and found his garage was open. Parking the bicycle next to his Mercedes, I ventured into the garage and knocked on the door to the house.
“I’m downstairs, Bingo,” Jock yelled from the basement. “Come on down, I want to show you what I created.”
I came inside and found Jock at the bottom of the stairs to the basement. He was wearing a blue baseball cap that caused the ends of his reddish-blonde hair to curl in the most adorable manner, while his white t-shirt and black shorts hugged his tall muscular body.
“So, what do you want to show me?” I asked as I descended the stairs.
“You’re the first to see this,” he said in an excited voice. “It’s a prototype, but if it works I think I can make a fortune from it.”
I came into the basement and found a large wooden pillory at the center of the space. I pointed to the pillory and asked, “Are you building that for the Renaissance Fair?”
POW of POW’s Fiction – Gay S&M Stories sent the information and pictures below, about how he was inspired to build his very own pillory, and how he pulled it off! See below:
I never paid much attention to pillories. But then one made an appearance in A Left Turn at Albuquerque – Part 07, and it caught my eye. Trying to avoid giving away any spoilers, this (heavily edited) exchange takes place:
Jailer: “How are you holding up in that thing?”
Prisoner: “It’s not comfortable.”
Jailer: “It’s not supposed to be.”
Followed by:
Prisoner: “Can you let me out of this thing?”
Jailer: “Of course I can. But I’m not going to. Under our rules, badly behaved convicts have to be in the pillory for at least five hours.”
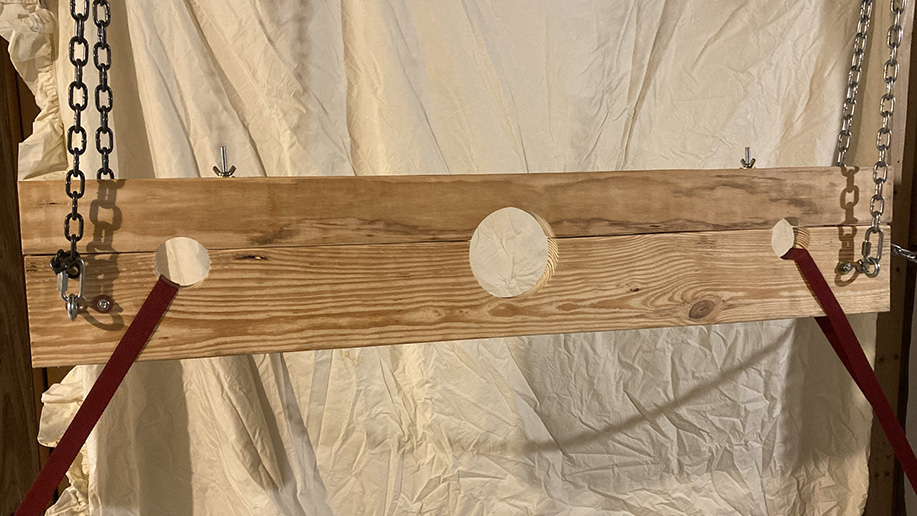
That fed right into something that is one of my core interest areas: long-term bondage with some sort of discomfort. Since I don’t know anyone who has a pillory, I decided to build one. Here’s the result:
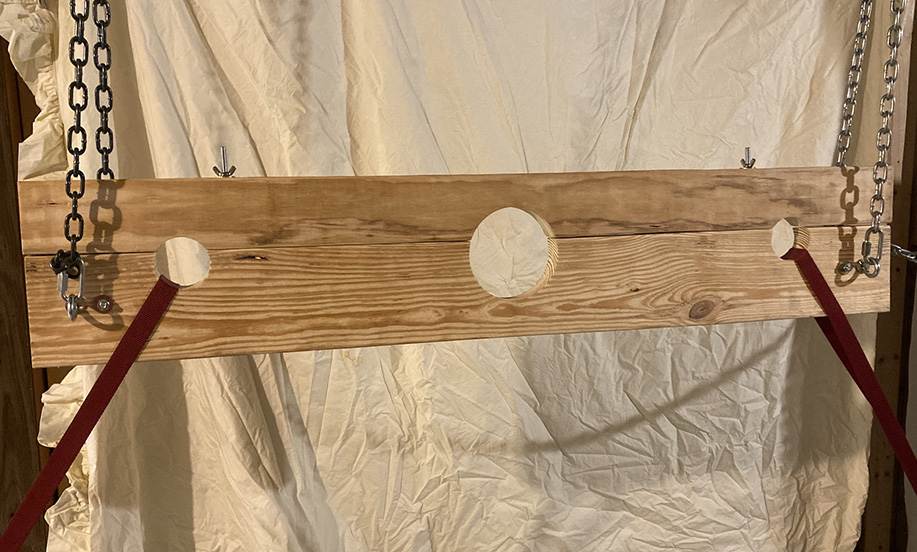
For the record, I am in no way a competent woodworker or craftsman, but nevertheless I’m pleased with how it turned out. If I could build this, I think almost anyone could. Very little skill required, just make sure you take adequate safety precautions.
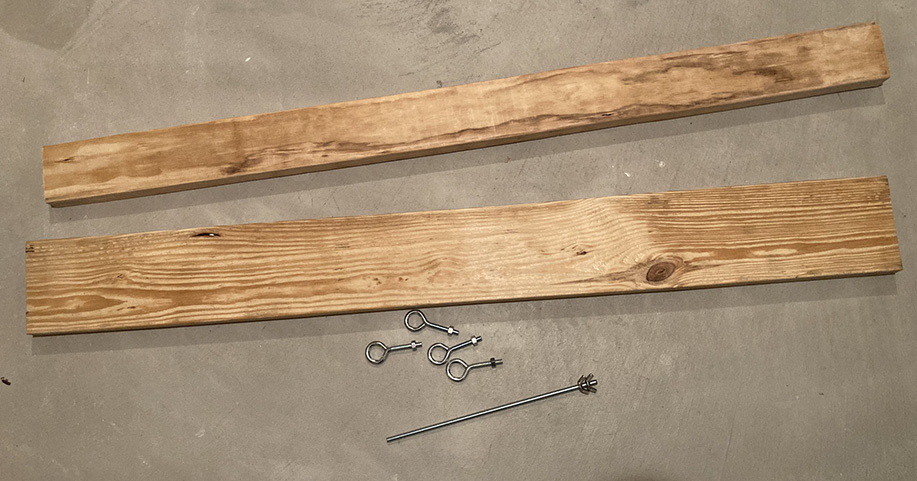
A typical pillory rests on a supporting stand. That was more complicated than I cared to attempt, but I had a good alternative: hang it from the steel beam running across my basement ceiling, and attach the sides to the support pillars that hold the beam up. The point is: The essential part of a pillory is the two separable wooden bars with half-holes in each for neck and wrists. Everything else is variable and you can adapt to suit whatever circumstances you have.
Note that whatever support you use, remember to fix only the bottom part of the pillory in place so the top part is free to move.
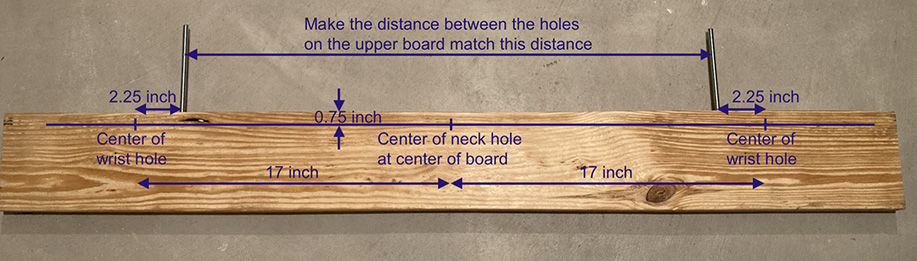
Measurements are given in inches and feet because that’s what’s available in my local hardware store. Convert to centimeters as needed at 1 inch = 2.5 cm.
Mark all measurements before drilling anything.

I considered applying some sort of stain or sealant but decided I prefer the look and feel of raw wood. If you do want to apply something, this is the time to do it.
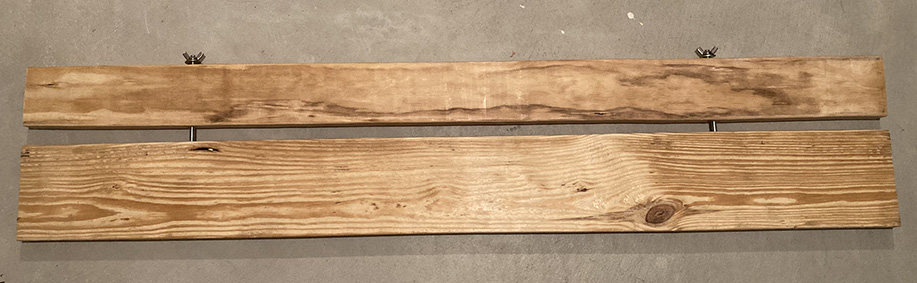
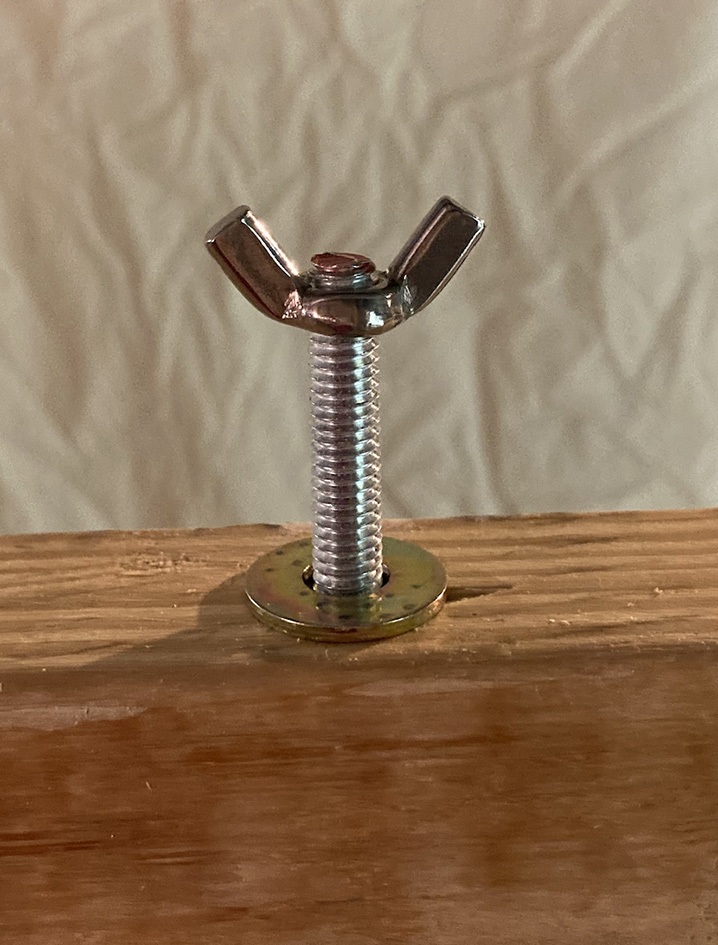
If you plan to use this with a partner, you’re done. The wing nuts on the threaded rods will be enough to lock the upper board against the lower one. The prisoner won’t be able to untwist them and set himself free, although the rods are tantalizingly close to his fingers and he will be tempted to try to reach them. He won’t be able to, though it will be fun to watch until he gives up.
If you want to use this for solo play, you’ll need a different way to hold the boards together. Make metal brackets to do the job.
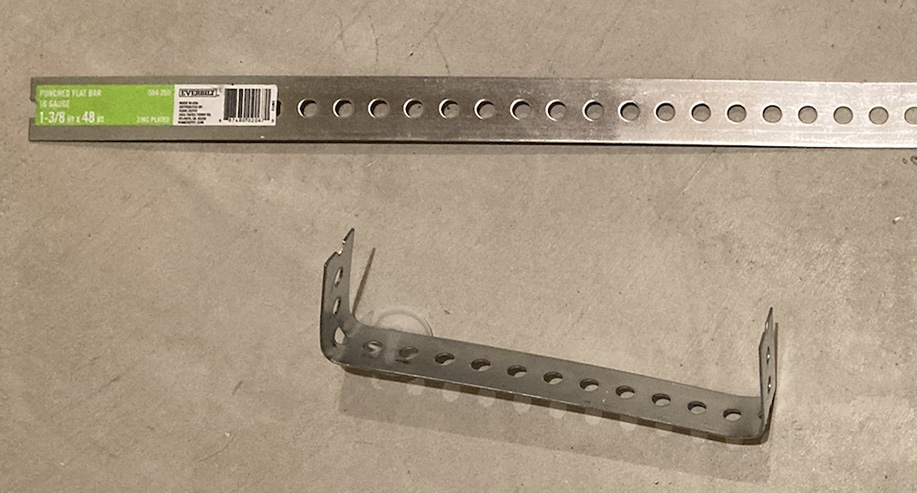
My metal strip came with pre-punched holes all along the center. If yours didn’t, you’ll need to drill a half-inch-diameter hole to fit over the threaded rod.
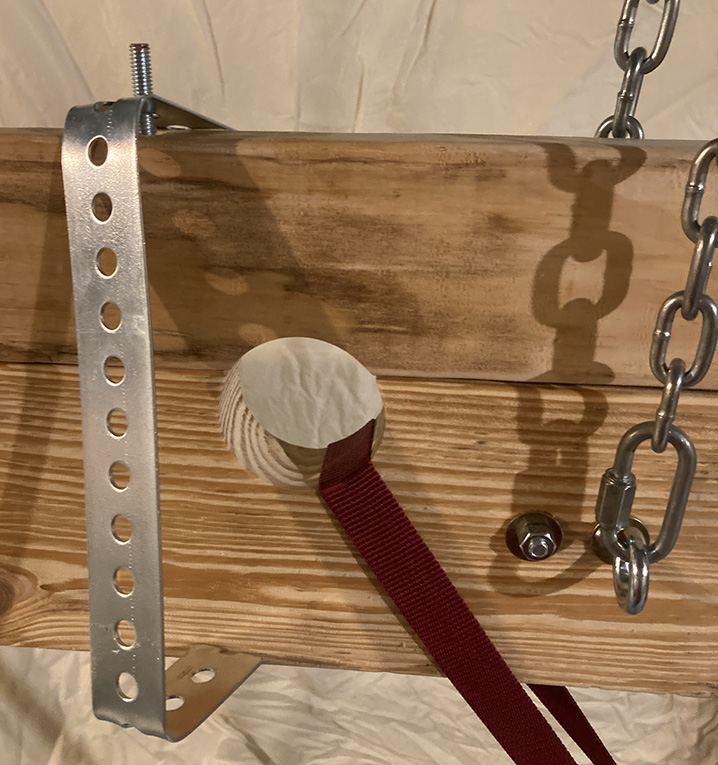
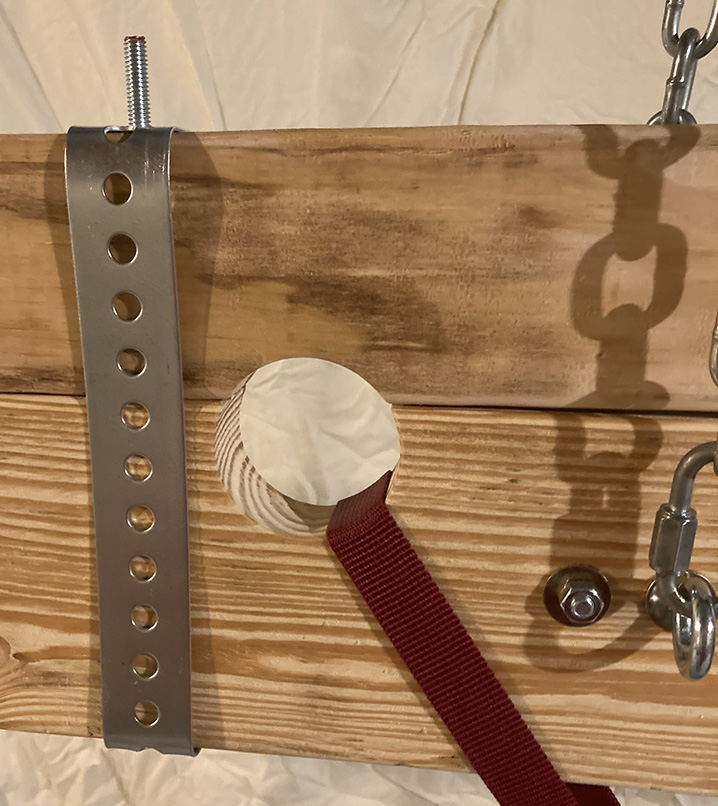
To use, put your neck into the neck hole but leave your wrists free. Fit each bracket over one of the threaded rods. Lift the top board slightly, just enough to get your wrists in place without dislodging the brackets, then lower the board back down. You should then be able to clamp the brackets into the locked position. Reason for this sequence: it’s difficult to fit the brackets onto the threaded rods with neck and wrists all placed in their holes; much easier to do it with free hands.
Making bends that are more than 90 degrees means that when they’re in place, the brackets apply up-and-down pressure to the two boards and hold them firmly together. That pressure also ensures that the brackets won’t slip loose until you deliberately remove them.
Your setup may vary, but mine works like this. I suspended chains from the overhead beam using S-hooks.
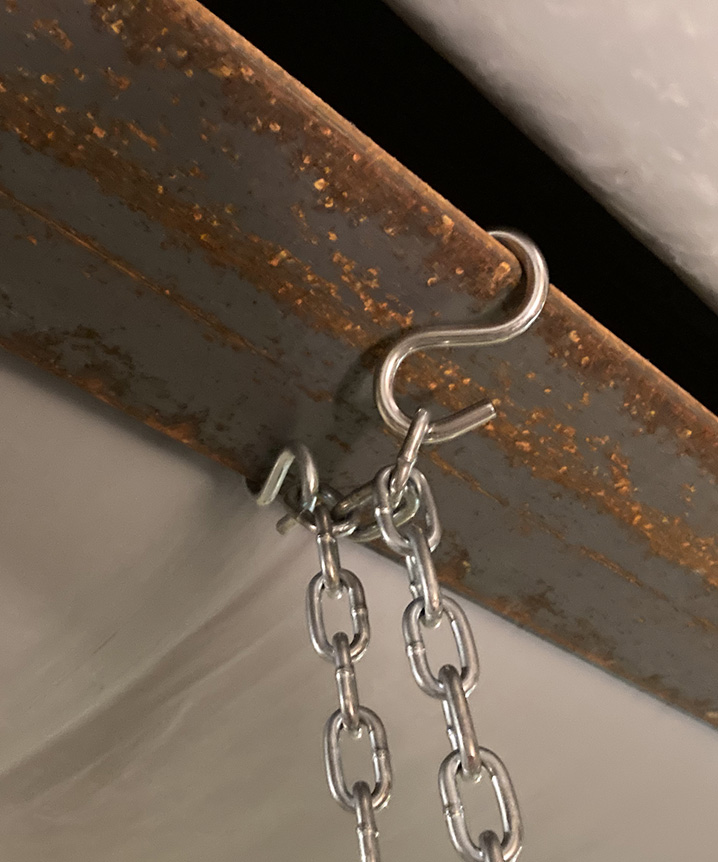
Those chains hold up the pillory using the mounting bolts. Then straps go through the wrist holes and down to the base of the posts that support the overhead beam.
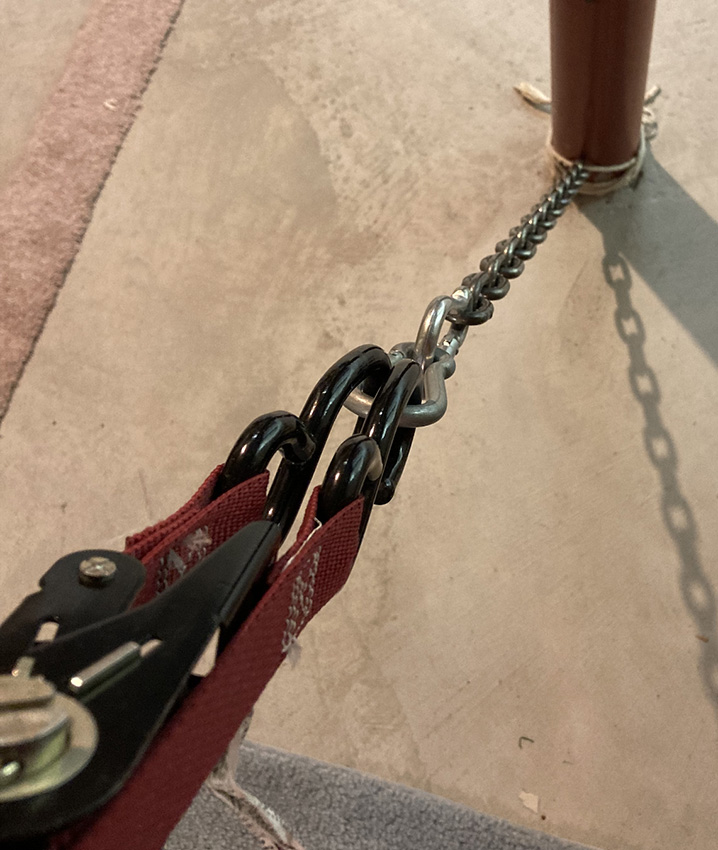
I cranked those straps down tight, and the pillory was fixed in position in up/down and left/right directions. Not shown: I tied the front mounting bolts to the wall studs in front, and the back bolts to a heavy table behind. That fixed the thing in all three dimensions so it could not move or tilt more than half an inch in any direction.
Again, if you’re a more talented woodworker than I am, you can create a support post and feet for your pillory. This version worked well enough for me. The pillory was fixed firmly enough that during my testing I couldn’t budge it; it held me exactly in position no matter how I struggled.
Important safety note, applicable to any self-bondage situation: plan and test and have multiple escape routes. Some people like to use timers or ice locks; I prefer to have an instant out available in case of emergency. House fire, sudden medical issue, whatever the reason, I want to be able to get free quickly when necessary. But within that constraint, I like the bondage to be real and secure. Using the metal brackets as locks meets those criteria. The locks are flush against the wood and easily reachable when needed but otherwise out of the way. Also, releasing either one is enough to get completely free — if my right hand were to go numb for some reason, I could open the left lock, get the left hand out, then reach under and release the right lock.
I ran a bunch of short test scenarios until I was confident everything was working as designed. I even did an hour-long trial run without using the locks just to see how my body would react. It went well. After that I was feeling like I could go considerably longer so I planned a test for real.
I decided on a three-hour sentence. Well short of the five hours described in the Alburquerque story, but long enough. The verdict? Success!
Standing was boring and uncomfortable, but it did not feel dangerous at any time. Comfort-wise, it made for a good mid-range experience. A sleepsack provides very comfortable bondage. When wrapped up snug in one of those you can drift away into a happy sub mindspace and stop noticing the passage of time. A Roman-style cross, at the other extreme, is incredibly uncomfortable. There is no getting into a Zenlike “I’m not here” mental space when hanging on one of those. The pillory, I learned, is in between. I found it to be uncomfortable enough that I could never zone out. I was always keenly aware of the slow passage of time and of my body’s discomfort. But the discomfort was never bad enough that I felt the need to cut the scene short and stop. I never felt in danger of lasting harm. Physically, I think I could have stayed there much longer. Mentally, though, I hit my limit for solo play and would have needed an enforcer to keep me there any longer once the three-hour alarm sounded.
Afterward, my arms were sore for the next thirty-ish minutes, and at first I was unable to lift them very high behind me. Soon enough that passed, and they were back to normal. My neck remained a little bit stiff for several hours, but there were no lasting after-effects from the experience.
I found this to be a worthwhile project, fun to build and fun to experiment with. I learned that a pillory provides exactly the sort of experience that pushes my buttons: long-term uncomfortable bondage. I really did not know how effective the pillory was at delivering that and find myself much more a fan of the device having now given it a chance. A big “thank you” to author Hunter Perez for providing the inspiration!
Metal would like to thank POW for this information and for these pictures! See more from POW by clicking here.
By Hunter Perez
Anyone who complains that I talk too much should spend an hour with Harry – he speaks at supersonic speed while weighing down his verbiage with a grab-bag of labored colloquialisms, off-tangent trivia and an endless supply of melodrama. I debated whether to share his story in its verbatim form, but I could not justify replicating the torture I experienced as his audience and, thus, I will offer the no-frills abbreviated version of his tale.
Harry worked in the finance office of a defense contractor based in New Mexico. He landed the job after graduating from college and remained there for a dozen years, with only a mild promotion in position and pay during that period – although he was insistent on thanking the company for covering the tuition costs so he could complete his graduate studies. As he was going into his thirteenth year with the company, he said that he uncovered some financial discrepancies he considered to be significant. He made some informal inquiries within the company but was unable to secure a satisfactory explanation regarding the final destination of the money in question. He approached his superiors about the matter, explaining at great length what he discovered.
“I was under the impression this would help raise my standing in the company,” he recalled.
Continue reading A Left Turn at Albuquerque Continued – Part 07
By Hunter Perez
The interior of the cottage looked as if somebody’s grandmother was recruited to inspire its décor: frilly lace curtains, heavily upholstered furniture, framed needlework on the walls and fragile doilies with porcelain figurines of fauns and lambs sitting atop sturdy oak tables. A fireplace took up much of a wall in the living space and an ornate clock was perched on its jagged wood mantlepiece. As I just emerged from a prison cell residency, the coziness overkill came as a shock.
The kitchen was large and more utilitarian in design and haphazard in its presentation, with dishes and pots scattered carelessly about. There was no running water for the large sink, and an oversized pitcher laying on its side in the basin challenged me to figure out how to clean the dishes and cookware without the benefit of a faucet. A wood-burning stove occupied a corner of the space. The box marked “cottage food” that Patterson carried over was plopped on a dark wood table with chairs parked on each of its sides.
By Hunter Perez
The sergeant sat on the platform at the base of the pillory and gave me another of his toothy overbite smiles. “You know, I never truly appreciated this thing until you came along. Normally, I prefer throwing guys into solitary confinement – the whole out-of-sight / out-of-mind thing. But you really are sexy when locked in – you have a nice lean body and I like watching it wiggle behind those boards. Too bad Thomas Edison won’t be inventing the movie camera for another 20 years, otherwise we’d be getting a jump start on the bondage flick genre.”
At this point, I couldn’t tell whether the sergeant was trying to be funny to amuse me or to amuse himself. Between the soreness of having my head and wrists locked in the heavy pillory boards and the shock in learning that he is also a time traveler, I would have welcomed the notion of solitary confinement just to be away from this assault on my senses.
By Hunter Perez
I blinked myself out of slumber, but I was in a sorry state. The back of my head throbbed and my body felt cold and stiff. But once I began to regain my composure, I could see why I was cold and stiff – I was naked on a stone floor, with nary a thread to separate me from my surroundings.
Even though my eyes were open, I had trouble focusing. I thought there was someone in sitting on a desk looking down at me, but my vision was too blurred to make out who it was.
“Nicky?” I asked. “What kind of crazy jokes are you playing on me?”
The blurry figure didn’t say anything, and I rubbed my eyes trying to regain my sight.
“I’ve got the worst headache,” to the person I couldn’t see. “Can you get me a couple of Tylenol, please?”
“A couple of what?” responded the person in a low, dull male voice – I couldn’t tell if it was Nicky or someone else.
By Joshua Ryan
Chapter 15: Crime and Punishment
Here’s the way it was. Every new slap had to spend at least 30 days being “trained.” The idea was that if you spend 30 days in the Chicken Coop, you find out what you are, an you be a good slappie, resta you life. “Good” meaning all slappie and nothing else. After that, the Program looked around for somebody to sell you to—I mean, somebody to take a lease on your labor service. Every few days, clients were invited to the Show Room and slap boys were displayed.
Sometime in my distant past, Major Timmons had explained it all. Then it had seemed less personal—much less personal than when it was discussed in the Scrum Room.
“They even got a catlog, dude. They be seein YOU, an you bare ASS, right in they laptop dude.”
“While they jerkin, I guess.”
“They jerkin for ME, anyways. Doan know for you, dude.”
When you were sold, you left the Coop and you were never seen again, unless you turned up working down the block from some other slap that trained with you. Then maybe you would meet him and share your happy memories.